Use an ice bath at 32°F, then boiling point adjusted for your altitude.
If you’ve ever doubted a doneness reading, you’ve already felt why learning how to calibrate a meat thermometer matters. I’ve trained cooks and home grillers for years, and I’ll walk you through how to calibrate a meat thermometer the simple way, using steps that work for digital and dial models. You’ll get clear methods, pro tips, and mistakes to avoid so every steak, roast, and turkey lands perfectly cooked and safe.

Why calibration matters for food safety and flavor
Accurate temperature is your best food safety tool. A few degrees can be the line between juicy and dry, or safe and risky. Most quality meat thermometers aim for about ±2°F accuracy. That’s great, but bumps, drops, or heat stress can push them off.
Calibrating keeps your readings honest. It makes your cooking consistent, builds confidence, and takes the guesswork out of big moments like brisket day or holiday turkey. If you’re here to learn how to calibrate a meat thermometer, you’re already on the right track.
Source: plattar.com
Know your thermometer: digital, dial, and smart probes
Not all thermometers adjust the same way. Knowing your type speeds things up when you’re learning how to calibrate a meat thermometer.
- Digital instant-read. Fast and accurate. Many allow a calibration or offset setting in the menu.
- Dial (bi-metal). Slower to respond but rugged. Most have a small adjustment nut under the head.
- Leave-in oven probes. Great for roasts. Some allow app or base-unit offsets.
- Infrared. Reads surface only. Not ideal for meat doneness and usually not adjustable.
Key point: If your device does not offer a calibration or offset setting, you can still test accuracy and note the difference mentally.

Source: youtube.com
What you need before you start
You don’t need lab gear to learn how to calibrate a meat thermometer. A stable ice bath and boiling water do the job.
- Crushed ice and cold water
- A tall glass or small container
- A pot for boiling water
- Clean towel or paper towels
- Your thermometer and any included wrench or tool
- Your elevation or local boiling point
Pro tip: Use plain water. Salt or sugar change freezing and boiling points.

Source: youtube.com
How to calibrate a meat thermometer: ice-point method
This is the easiest and most reliable start. Ice water sits at 32°F if made right.
- Fill a glass all the way with crushed ice. Add cold water to cover. Stir 10 to 15 seconds.
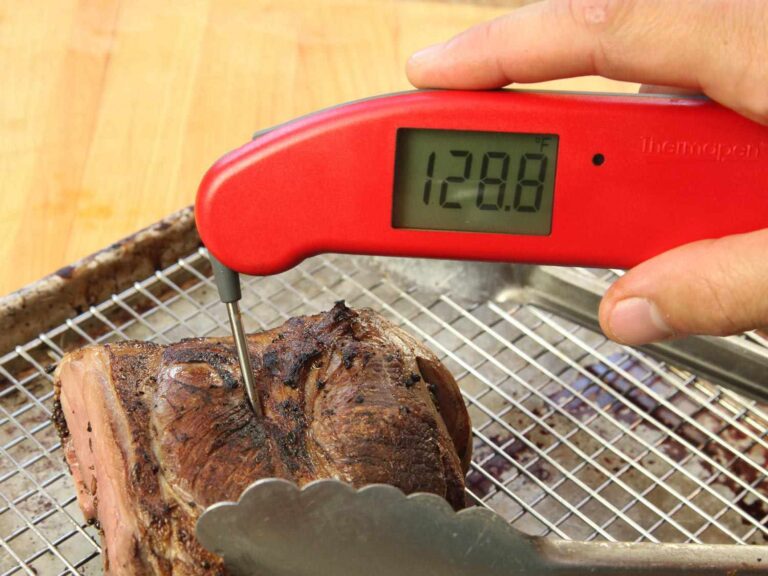
- Insert the probe so only the tip is submerged. Do not touch the sides or bottom.
- Wait for the reading to settle. Digital settles in 5 to 10 seconds; dial may take up to 30 seconds.
- You want 32°F. If it’s off, adjust:
- Digital: Use the calibrate or offset setting to make it read 32°F.
- Dial: Hold the head and turn the small nut under it until it reads 32°F.
- Rinse and dry the probe.
Why this works: An ice bath is stable and repeatable. It’s the go-to method culinary schools teach for how to calibrate a meat thermometer.

Source: kansasbeef.org
How to calibrate a meat thermometer: boiling-point method
This gives you a second point near cooking temps. Boiling point changes with altitude, so set your target first.
- Sea level: 212°F
- 1,000 ft: about 210°F
- 2,000 ft: about 208°F
- 3,000 ft: about 206°F
- 5,000 ft: about 203°F
- 7,000 ft: about 199°F
Steps:
- Bring a pot of clean water to a rolling boil.
- Insert the probe tip into the bubbling water without touching the pot.
- Wait for the reading to stabilize.
- Compare to your target boiling point for your elevation.
- Adjust the offset or nut so it matches your target.
Pro tip: If you can only do one test when learning how to calibrate a meat thermometer, pick the ice bath. It’s less fussy and more consistent at home.
Source: kansasbeef.org
Set the offset: digital vs dial adjustments
Adjustments vary by brand, but the idea stays the same across how to calibrate a meat thermometer.
- Digital thermometers
- Check the manual for a calibrate or “CAL” mode.
- If no CAL mode exists, some apps or base units let you set an offset.
- If none of the above, note the difference and apply it mentally.
- Dial thermometers
- Use the small wrench or hold the head and turn the rear nut.
- Adjust in tiny moves, then recheck in the ice bath.
Accuracy tip: Aim for ±2°F or better. If your unit can’t hit that after careful steps, consider replacing it.

Source: amazon.com
How often to calibrate and when to recheck
I recheck weekly on the restaurant line and before big cooks at home. If you’re learning how to calibrate a meat thermometer for daily use, make it a quick habit.
Recheck after:
- A drop or hard knock
- Big temperature swings
- Dishwasher cycles for dial models
- Long storage
- When readings feel “off” in real cooking
Simple rule: Trust but verify. A 60-second ice-bath check saves dinner.

Source: youtube.com
Common mistakes and how to avoid them
Little things throw readings off. These are the usual traps when figuring out how to calibrate a meat thermometer.
- Bad ice bath. Use mostly ice with just enough water to fill gaps. Stir first.
- Touching sides or bottom. That conducts heat and skews results.
- Not waiting for stabilization. Give it a few extra seconds.
- Dirty or wet probe. Residue can insulate or alter readings.
- Ignoring elevation. Boiling point is not always 212°F.
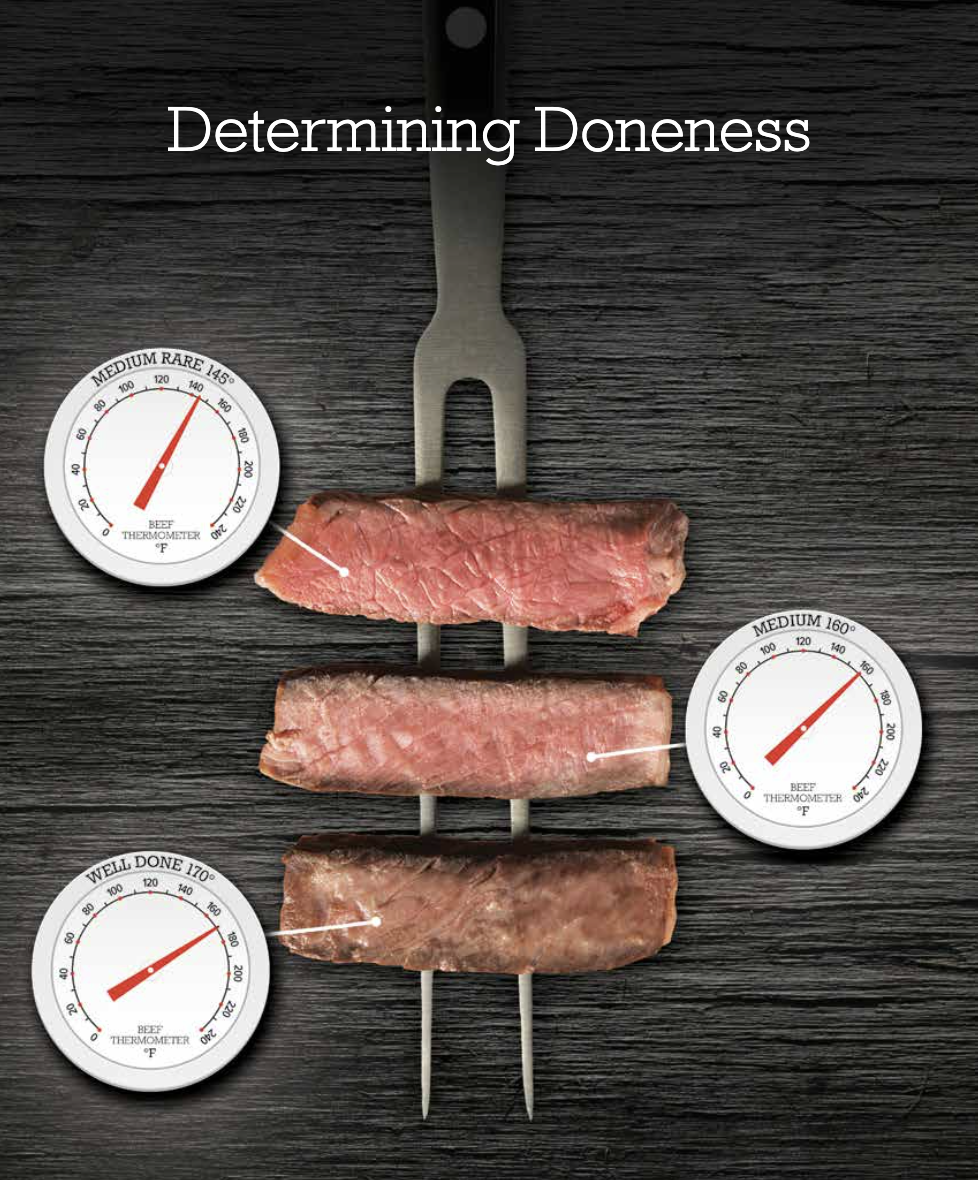
Cooking mistake to avoid: With dial thermometers, make sure the dimple on the stem is past the center of the meat. That’s the sensing area.
Pro tips from the kitchen line
These are small habits I teach when showing cooks how to calibrate a meat thermometer.
- Mark your offset. A tiny label on the case reminds you if it reads +1°F or −1°F.
- Baby the probe wire. For leave-in probes, keep the cable off hot pan edges.
- Store it dry. Moisture creeps into joints and hurts accuracy over time.
- Cross-check on a known cook. Chicken breast should hit 165°F in the thickest part. If you are hitting 175°F and it’s still pink, recheck the tool.
- Keep spare batteries. Weak power can slow readings and cause drift.
Personal note: A dial unit once ran 6°F low on my grill. My chicken looked done but was under. A one-minute ice bath would have saved the cook. That’s when I started teaching how to calibrate a meat thermometer to every new line cook.
Frequently Asked Questions of how to calibrate a meat thermometer
How do I know if my thermometer needs calibration?
Check it in an ice bath. If it does not read 32°F after stabilizing, it needs adjustment or an offset.
Can I calibrate every thermometer?
Many digital and dial models can be adjusted. If yours cannot, test accuracy and remember the difference, or replace it if the error is large.
What if I don’t know my elevation?
Search your city’s elevation once and note it in your kitchen. Or test with the ice bath only, which is accurate at 32°F anywhere.
Is boiling water or ice water better for calibration?
Ice water is more stable and easier at home. Boiling water adds a second point closer to cooking temps for better confidence.
How often should I calibrate my meat thermometer?
Weekly if you cook often, and always after drops or weird readings. At minimum, test before big cooks or holidays.
What accuracy should I aim for?
Shoot for ±2°F or better. If you cannot achieve that after careful calibration, consider a higher-quality thermometer.
Can I use salted ice water?
No. Salt lowers the freezing point and ruins the 32°F target. Use plain water and clean ice.
Do infrared thermometers work for meat doneness?
They read surface temps only. For doneness, use a probe thermometer that reads internal temperature.
Why does my dial thermometer take so long to settle?
Bi-metal coils react slower. Hold steady and wait up to 30 seconds for a stable reading.
Can I calibrate a thermometer in cooking oil?
You can, but it is risky and less stable. Stick to an ice bath and boiling water for safe, repeatable results.
Conclusion
A reliable thermometer turns guesswork into good cooking. You now know how to calibrate a meat thermometer with an ice bath, confirm it near boiling, and set offsets for digital or dial tools. Build this quick check into your routine, and your steaks, roasts, and holiday birds will show the payoff.
Put it to work today: test in ice water, set your offset, and cook with confidence. Want more guides like this? Subscribe, share your results, or drop a question in the comments.